How to Install a 3-Way Light Switch Step by Step Guide?
Installing a 3-Way Light Switch can seem daunting. However, it is a valuable skill for homeowners. According to the National Association of Home Builders, about 70% of homeowners undertake DIY projects each year. This trend shows a growing interest in home improvement.
“Understanding the basics of a 3-Way Light Switch can save you time and money,” says Mark T. Reynolds, an electrical expert with over 20 years of experience. His perspective highlights the importance of knowledge in DIY electrical work. Many homeowners shy away from electrical tasks due to fear or misconceptions. Learning to install a 3-Way Light Switch can empower you.
However, mistakes can happen. You might find yourself confused by wiring colors or switch placements. Such errors can lead to frustration or even unsafe situations. Yet, with the right guidance, these issues can be avoided. The process becomes manageable, enabling you to improve your home efficiently.
Understanding the Basics of 3-Way Light Switches
Understanding a 3-way light switch is crucial for effective home lighting design. Unlike standard switches, a 3-way switch has three terminals. This setup allows you to control a single light from multiple locations. It's commonly used in hallways or large rooms.
When dealing with wiring, always prioritize safety. Turn off the power at the circuit breaker before starting any work. This will help prevent electrical shocks. Using a voltage tester can confirm that the wires are not live.
Tips for beginners include carefully labeling all wires before detaching them. This practice can save you time and confusion later. If you encounter unusual wiring setups, take photos. These can serve as references during installation. Always double-check connections to avoid faulty setups. Mistakes can lead to short circuits or malfunctioning lights.
Having a basic understanding of these switches enhances your confidence. It's okay to feel uncertain while undertaking new projects. Each experience builds your skills. Embrace the learning curve.
Tools and Materials Needed for Installation
When preparing to install a 3-way light switch, gathering the right tools and materials is crucial. You will need a few basic items to begin. First, have a flathead and a Phillips screwdriver ready. A voltage tester helps ensure safety by detecting live wires. Wire cutters and strippers are essential for trimming and preparing the wiring. Additionally, electrical tape and wire nuts will secure your connections.
Gather the materials too. You will need two 3-way switches for the setup. A standard light fixture will complete the circuit. Ensure you have the appropriate gauge electrical wire, typically 14 or 12 gauge, depending on your circuit. It’s wise to keep a flashlight on hand. Working in dim lighting can be challenging.
While this guide provides a clear framework, issues might arise. You may find extra wires that seem confusing. Identifying each wire's purpose can take time. Remember, it's okay to pause and reevaluate if something doesn't seem right. Patience is key in any installation process.
3-Way Light Switch Installation Steps Breakdown
This bar chart illustrates the average time (in minutes) taken for each step involved in the installation of a 3-way light switch. The data reflects common experiences shared by DIY enthusiasts.
Step-by-Step Instructions for Wiring a 3-Way Switch
Installing a 3-way light switch can enhance your home's lighting control. This guide will focus on the wiring process. A 3-way switch allows you to control a light from two different locations. It’s useful in large rooms or hallways.
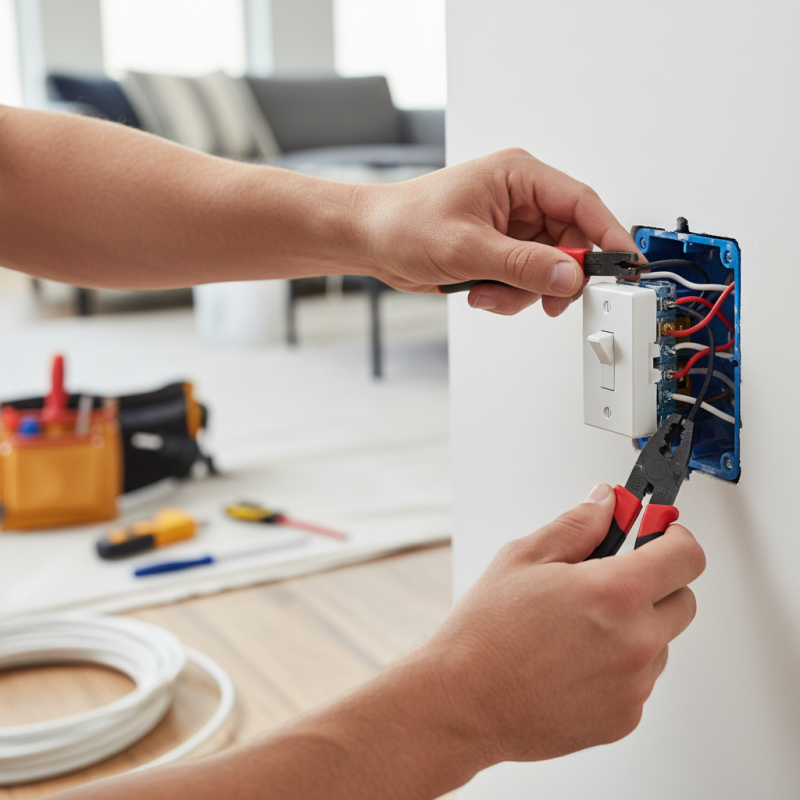
Start by turning off the power at your circuit breaker. Use a voltage tester to ensure the wires are dead. Next, remove the existing switch. Pay attention to how the wires are connected. You will typically find a black, white, and ground wire. Take a photo for reference.
When wiring the new switch, connect the black wire to the common terminal. The traveler wires connect to the two remaining terminals. Don’t forget to attach the ground wire to the ground screw.
**Tips:** Label your wires. This step prevents confusion later. Always double-check your connections. An improper connection can cause a short circuit. Test the switch before securing it into the wall.
Some might find this task challenging. It’s okay to seek help if you’re uncertain. DIY projects can teach valuable skills, but safety must come first. Understanding basic wiring principles can help you tackle future projects.
Common Mistakes to Avoid During Installation
Installing a 3-way light switch can be tricky. One common mistake is overlooking the need for a traveler wire. Many DIY enthusiasts don't realize that this wire is crucial for connecting the two switches. According to the National Electrical Contractors Association, incorrect wiring is the leading cause of electrical hazards in homes.
Another frequent error is mislabeling the wires. When switching from the old to the new light switch, it’s important to document where each wire connects. Failing to do so can lead to confusion. A study by the Electrical Safety Foundation International found that 28% of home electrical issues arise from improper labeling and connections. This not only creates problems during installation but can also result in malfunctioning switches.
Also, forgetfulness about safety measures can be fatal. Always turn off the circuit breaker before beginning your work. Many believe checking with a voltage tester is sufficient. However, this is not always foolproof. Electrical injuries and fatalities are often linked to neglected safety protocols. Always prioritize safety first to avoid learning this the hard way. Mistakes can occur, but awareness of these common pitfalls will help ensure a safer installation process.
Testing the 3-Way Switch Functionality After Installation
After installing a 3-way light switch, testing its functionality is crucial. Start by turning the power back on at the circuit breaker. This is a simple step, but forgetting it can often lead to confusion. Once the power is on, check both switch locations. Each switch should turn the light on and off independently. If it doesn’t, that indicates a wiring issue that needs immediate attention.
To confirm proper operation, try flipping each switch several times. Pay attention to any flickering or delays in the light. A smooth, responsive action is key. If you encounter problems, double-check your connections. Ensure that the common terminals are correctly wired. It's easy to misinterpret these during installation, resulting in faulty performance. Troubleshooting now will save you from future headaches.